Goal
When a visitor clicks Submit, send an email to your customer service inbox with the subject Customer sent a message and the visitor’s message in the body.
Try it yourself
Steps
1. Add the form fields
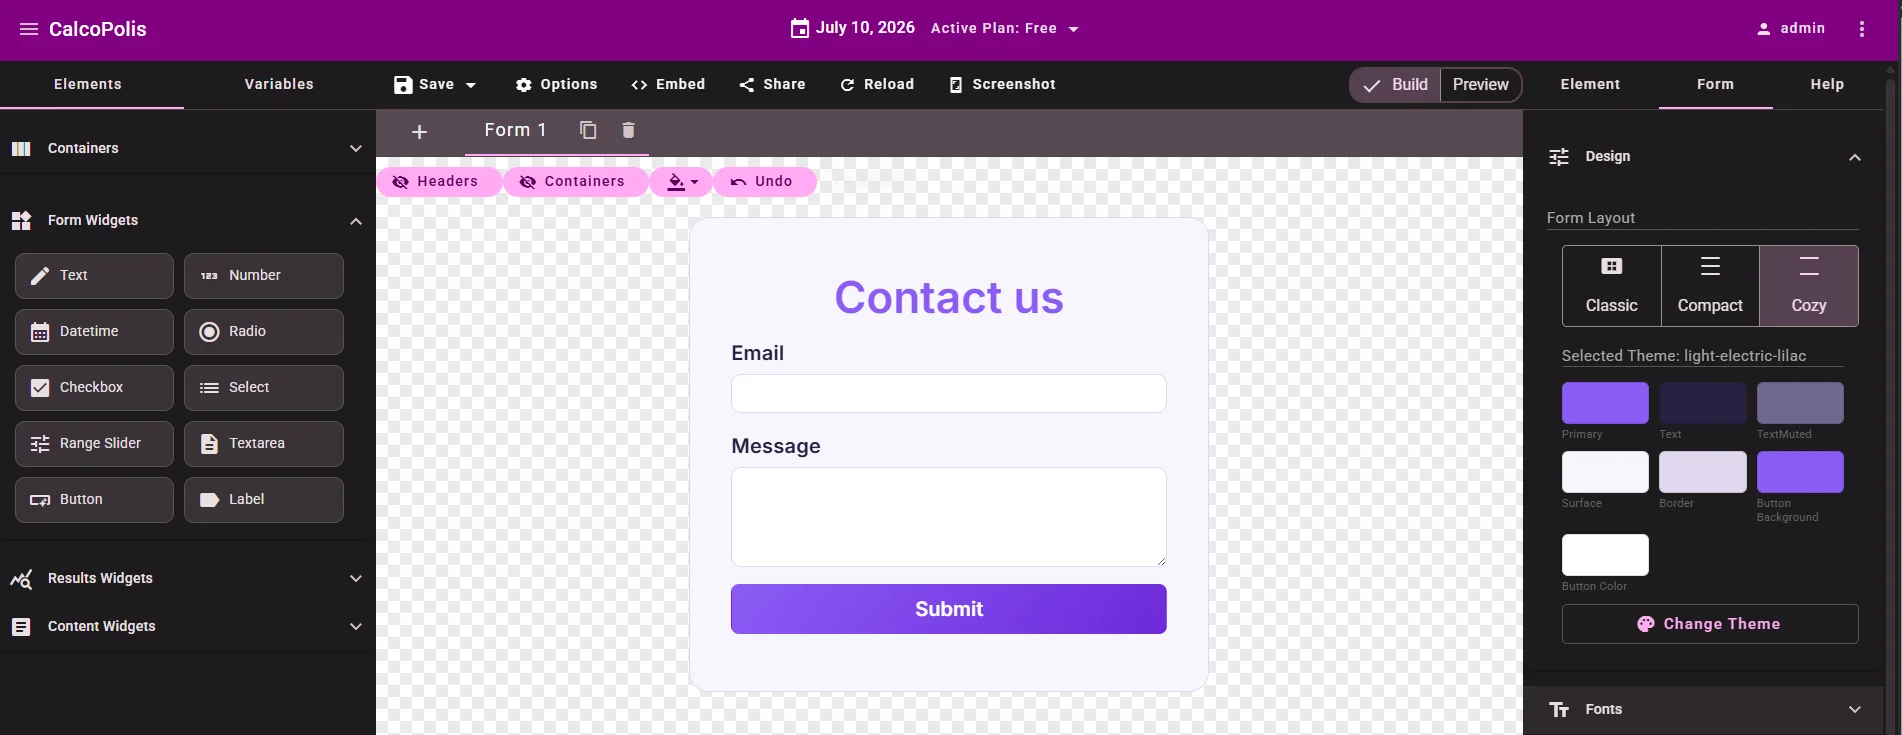
Open your project in the builder (or create a New Form). Add:
| Widget | Name | Label |
|---|---|---|
Text (email type) |
email |
Email |
| Textarea | message |
Message |
| Button | (any) | Submit |
On the Email field, open Validation → Required → Required, Type → Valid email.
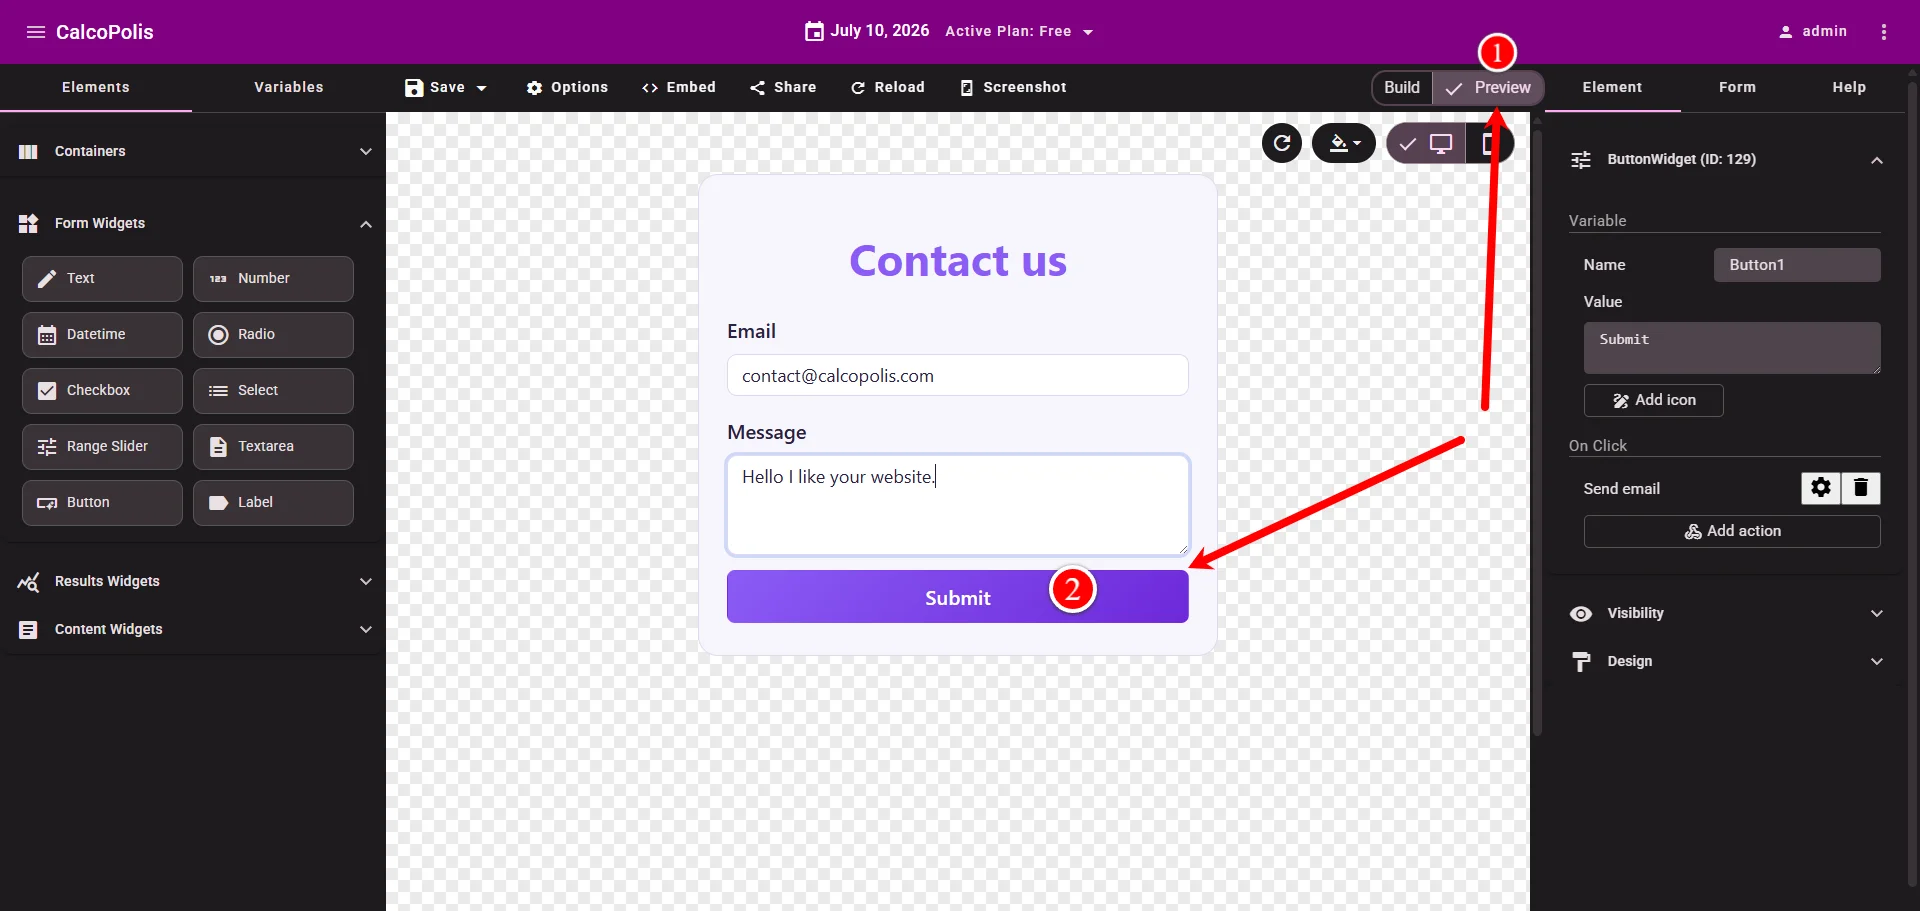
The form should look like on the screen below:
2. Add a variable for your inbox address
The Send Email action needs a Recipient — the address that receives the notification (your support / BOK inbox).
- In the left sidebar, open the Variables tab.
- Click New Variable.
- Set Name to
bok_emailand Value to your team inbox, e.g.support@yourcompany.com. - Save the variable.
This value is not shown to visitors; it only tells Calcopolis where to deliver the email.
Before you continue: click Save → Save Draft in the builder toolbar. The message editor needs your form variables (email, message) — they are only available after the project is saved.
3. Create the message template
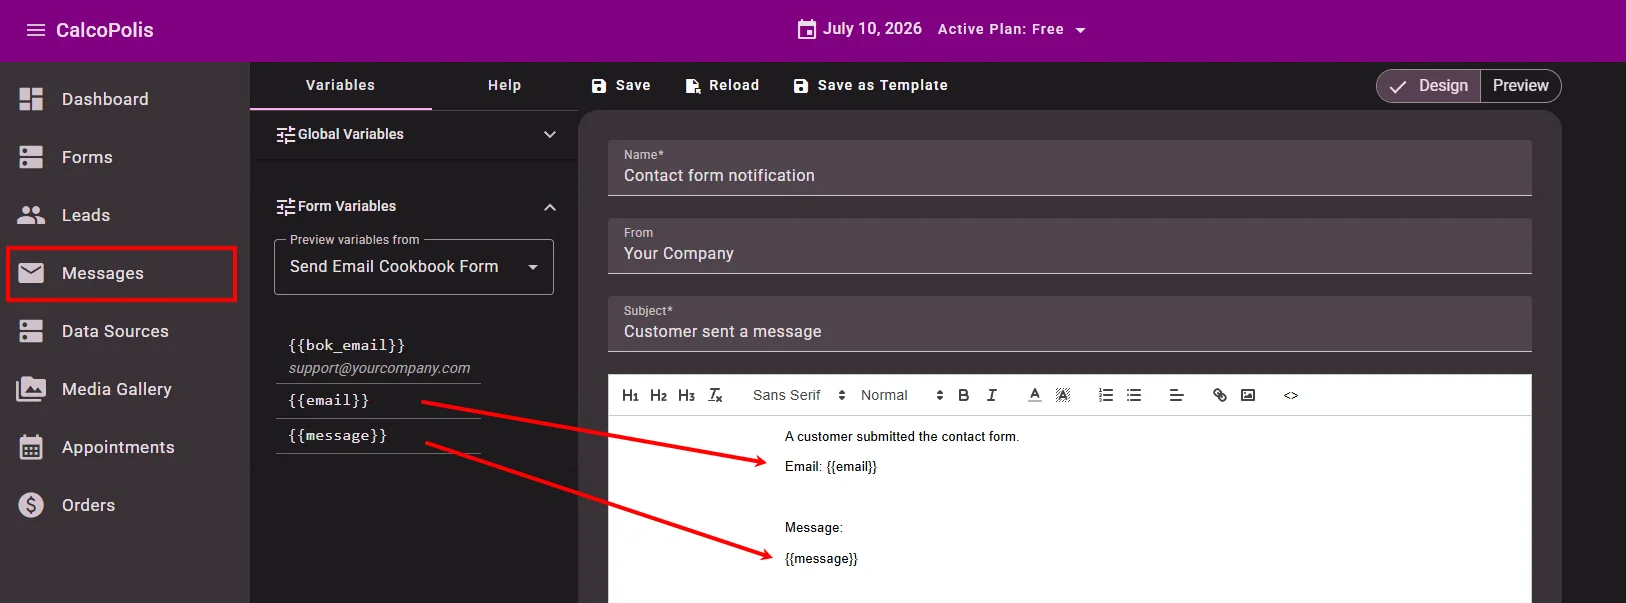
- From the main menu, open Messages.
- On the New Message card, click Create.
- Fill in the template:
| Field | Example |
|---|---|
| Name | Contact form notification (internal label) |
| From | Your Company (sender name in the inbox) |
| Subject | Customer sent a message |
| Content | See below |
In the message body, insert the visitor’s text with variables:
A customer submitted the contact form.

Email: {{email}}

Message:
{{message}}
Use the Variables panel on the left to see available names (email, message). Type {{email}} and {{message}} exactly as shown — they are replaced with form values when the email is sent.
- Click Save.
4. Add the Send Email action
- In the builder, select the Submit button.
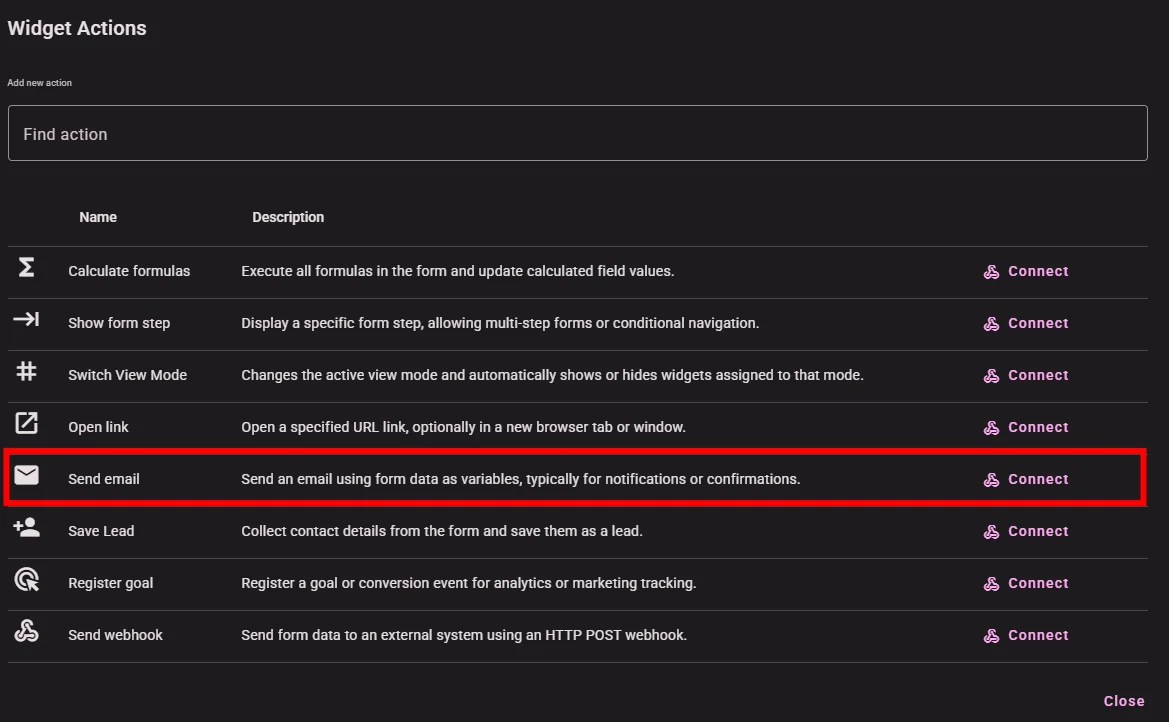
- Under On Click, click Add action.
- Find Send Email and click Connect.
5. Configure Send Email
- Click the settings icon next to Send Email.
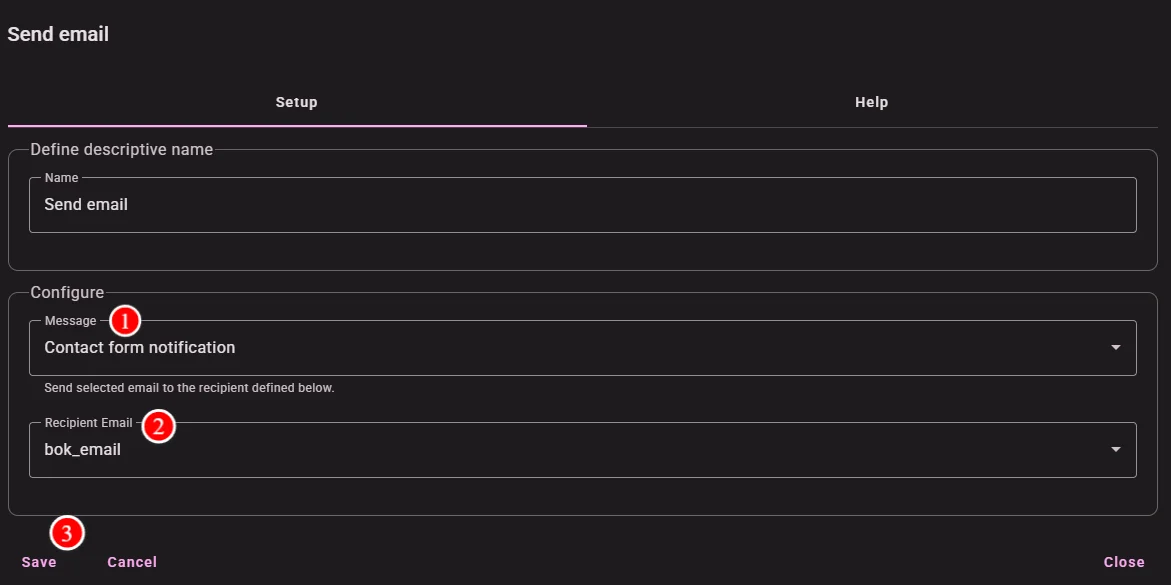
- On the Setup tab:
| Field | Select |
|---|---|
| Message | Contact form notification (the template from step 3) |
| Recipient | bok_email |
- Close the dialog.
- Click Save → Save Draft.
6. Test in Preview
- Switch to Preview.
- Enter a valid Email and a short Message.
- Click Submit.
Verify
- Check the bok_email inbox — you should receive an email with subject Customer sent a message and the visitor’s text in the body.
- Optionally, from the main menu open Messages and confirm the Emails sent counter increased.
For a live embedded form, publish the project (Save & Publish) before testing on your website.
Troubleshooting
| Problem | Solution |
|---|---|
| No email received | Confirm Recipient is bok_email and the variable value is a valid address. Save the project after configuring the action. |
| Empty message body | Check the template uses {{message}} — variable Name must match (message). |
| Visitor email missing in email | Add {{email}} to the message template body. |
| Send Email not in the list | Save the form draft and reopen Add action. Check your plan includes email actions. |
| Works in Preview but not on site | Publish first (Save & Publish), then test the embedded form. |
See also
- Save a Lead from Your Form — store submissions in Leads instead of email
- Button — On Click actions
- SEND_EMAIL Command — all Send Email options