In about 30 minutes you will go from a blank canvas to a live, embeddable business calculator — one that quotes a price, captures leads, and runs on your website. No coding, no per-field styling rabbit holes. When you finish, you will know how to build, test, publish, and embed a calculator that actually works for your business.
What you will build
We will create a life real project: a Video Editing Quote Calculator for a video-editing service. The same pattern applies to any quote + lead workflow (photography, consulting, catering, and more).
The form will guide the user through a three-step process.
| Step | Form name | Purpose |
|---|---|---|
| 1 | Get a Quote | Average video length, number of videos, live price estimate |
| 2 | Contact Us | Email + message, save lead |
| 3 | Thank You | Confirmation screen |
Try it yourself
Step 1 — Open the form builder
- From the dashboard, open Forms (
/forms). - Click New Form (or go directly to
/form/new).
The builder opens with an empty canvas. You do not need to save anything yet — start by adding content in the next step.
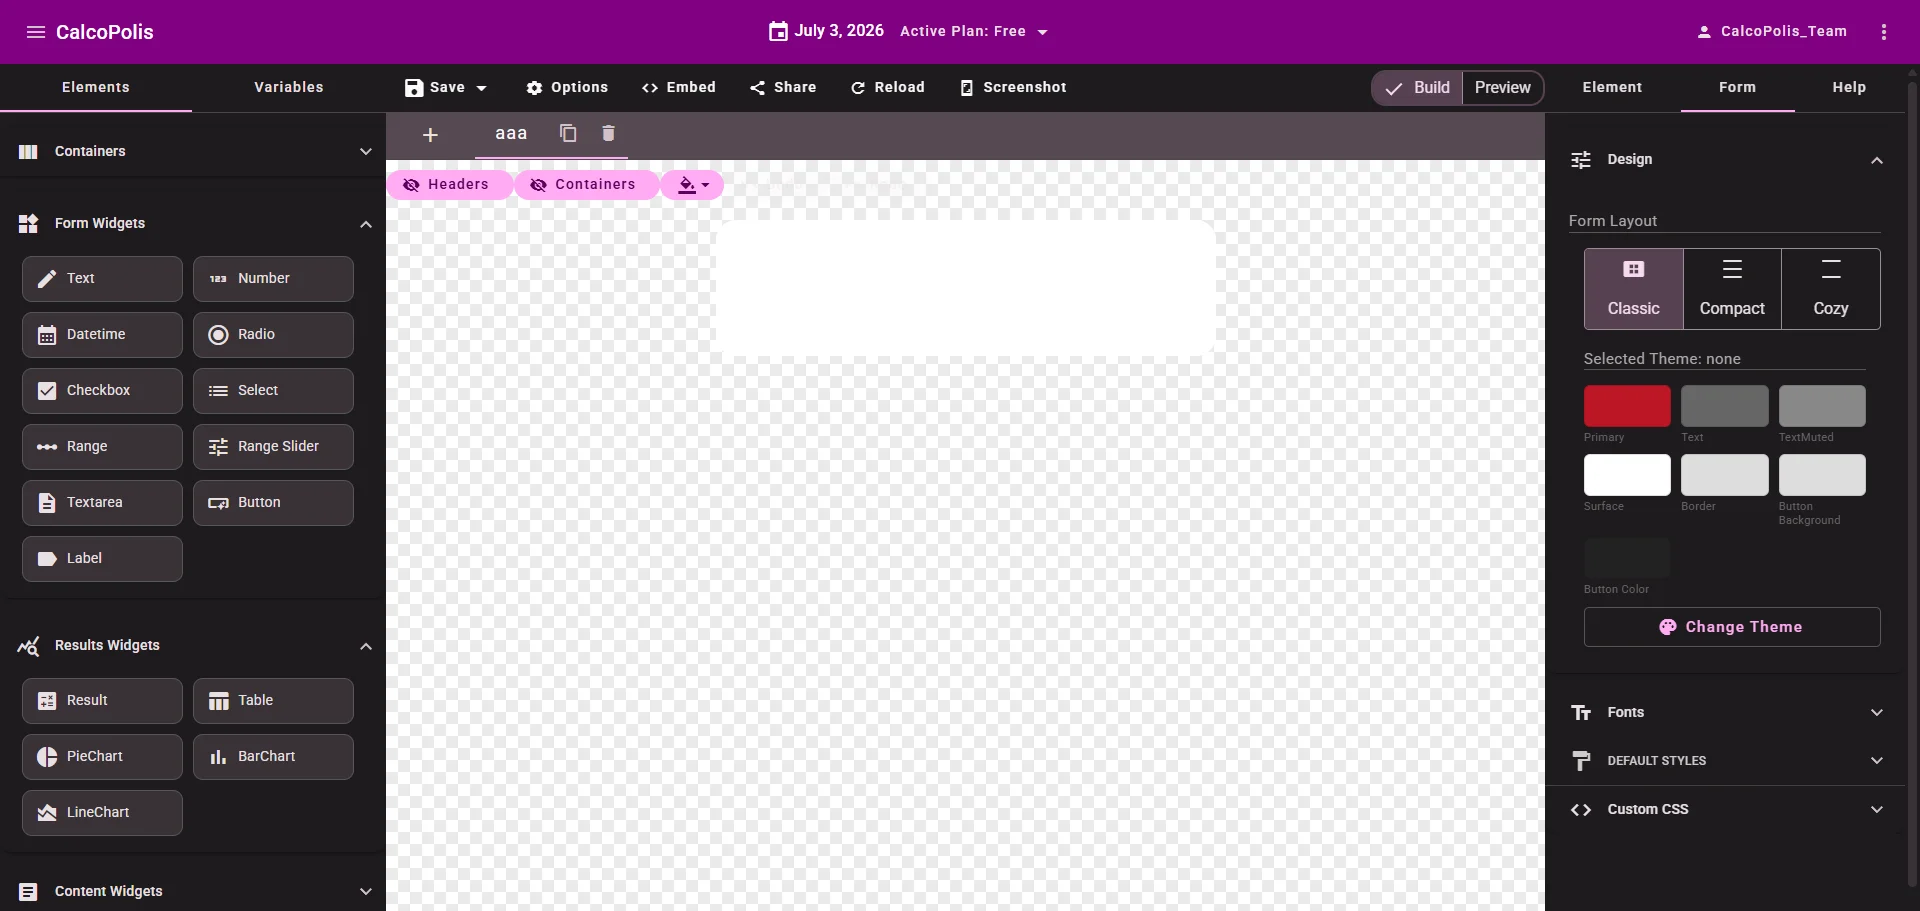 Figure 1 — The builder ready for your first calculator
Step 2 — Add widgets to the first form
Stay on the default subform tab. Rename it to Get a Quote (click the tab name, or select the form container → Form Options → Name).
In the left sidebar, open the Elements tab. Widgets are grouped in accordion sections — expand the section you need, then drag the widget onto the canvas.
Header
- Content Widgets → Header
- Set text to
Video Editing Quote
Custom Text
- Content Widgets → Custom Text
- e.g. Get an instant estimate for professional video editing.
Number
- Form Widgets → Number
- Name:
avg_length - Label:
Average video length (minutes) - Default value:
5 - Min:
1
Range Slider
- Form Widgets → Range Slider
- Name:
num_videos - Label:
Number of videos - Min:
1, Max:20, Default:3 - Value position:
Inside handle
Result
- Results Widgets → Result
- Name:
estimated_quote - Label:
Estimated quote - Formula:
= avg_length * num_videos * 25 - Output format:
CURRENCY_USD - Decimal places:
2
The 25 in the formula is your rate in USD per minute per video — adjust it to match your pricing.
Button
- Form Widgets → Button
- Set label to
Contact Us - Do not add button actions yet — you will wire this button in Step 6.
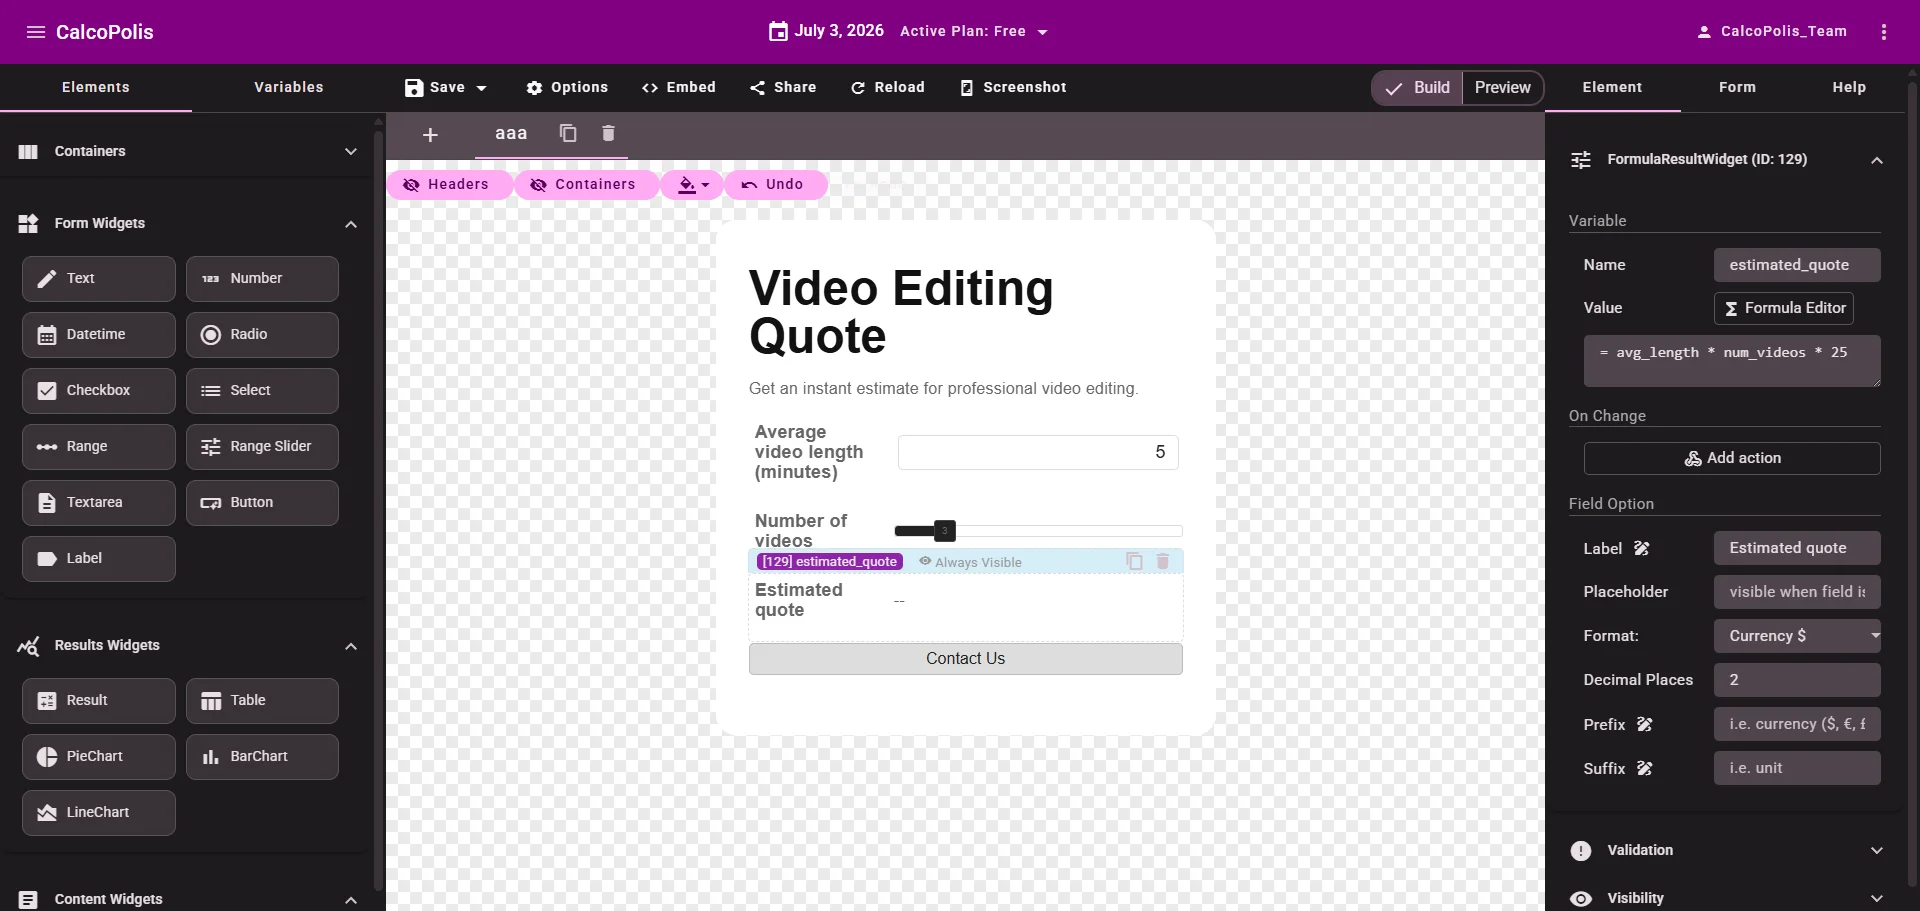 Figure 2 — Quote inputs, result, and Contact Us button
Step 3 — Choose a theme
Style the entire calculator in one go — no need to edit individual fields in this tutorial.
- Open the Form tab in the right sidebar.
- Under Design, click Change Theme.
- Browse the gallery, preview a theme, and click Select.
- Optionally change Form Layout (Classic, Compact, or Cozy).
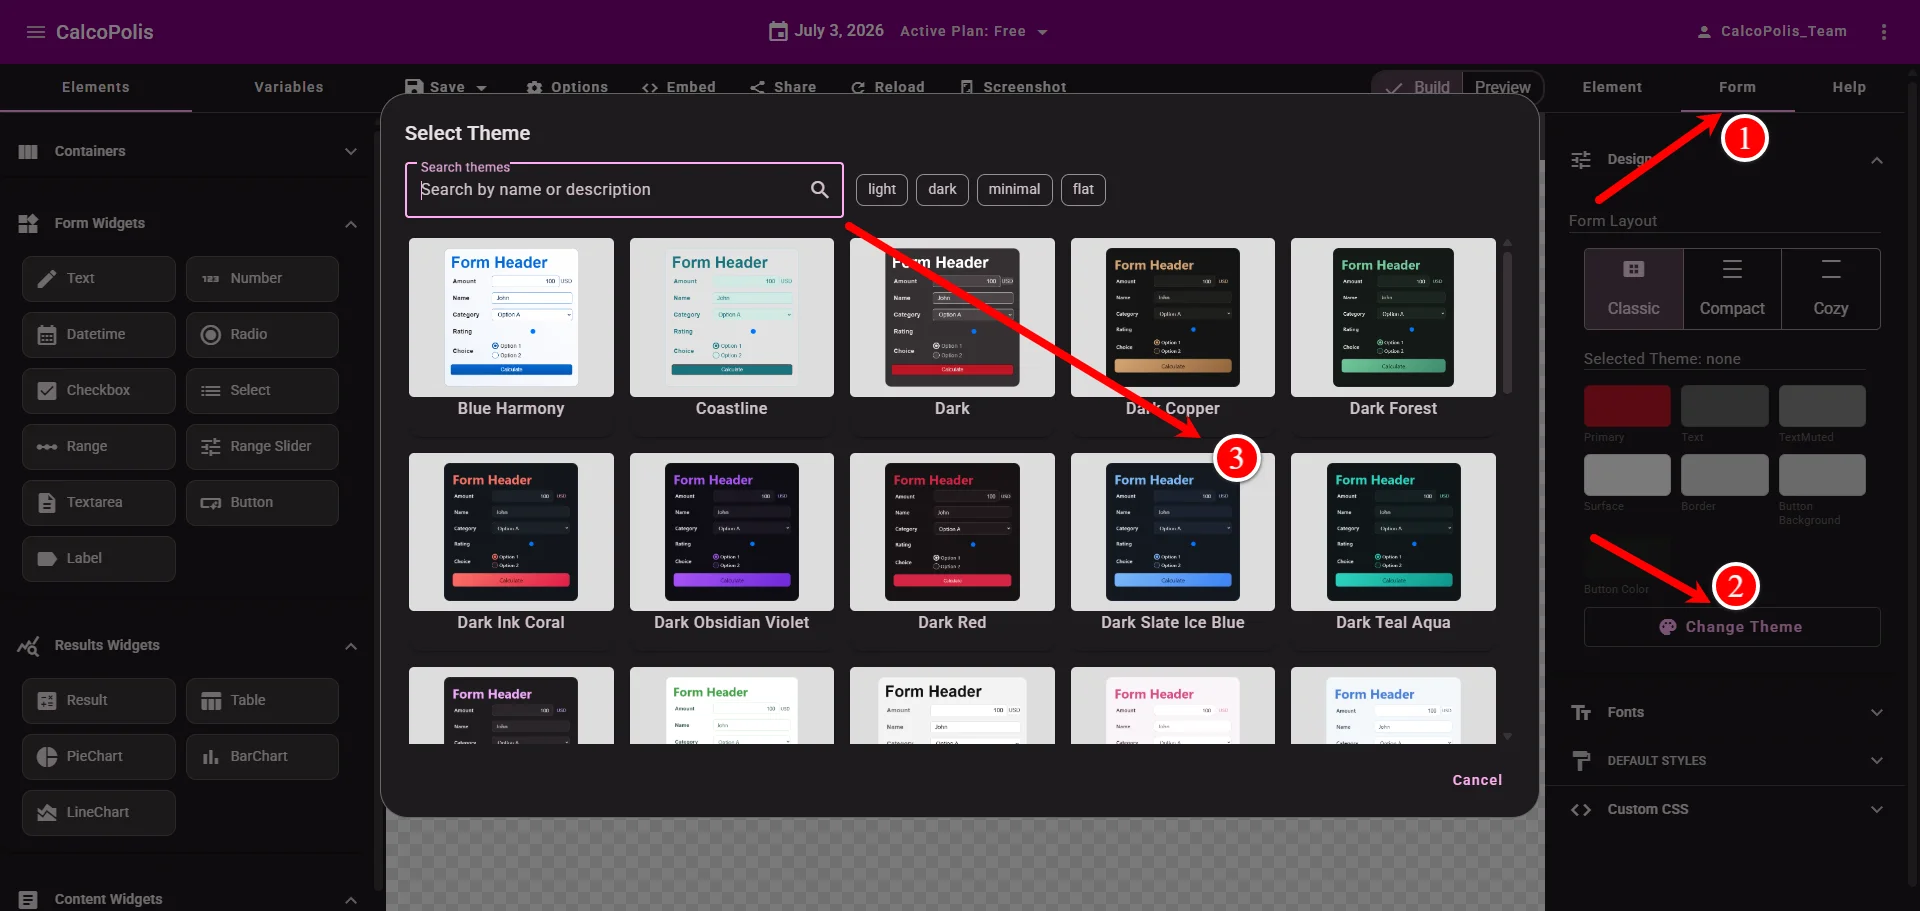 Figure 3 — One theme styles the whole calculator
Step 4 — Save, name the project, and enable auto-calculate
- Click Options in the top toolbar.
- Set the project Name to Video Editing Quote Calculator.
- Set On load to Run calculation on load — the quote will update live as visitors change inputs.
- Close Options.
- Click Save → Save Draft.
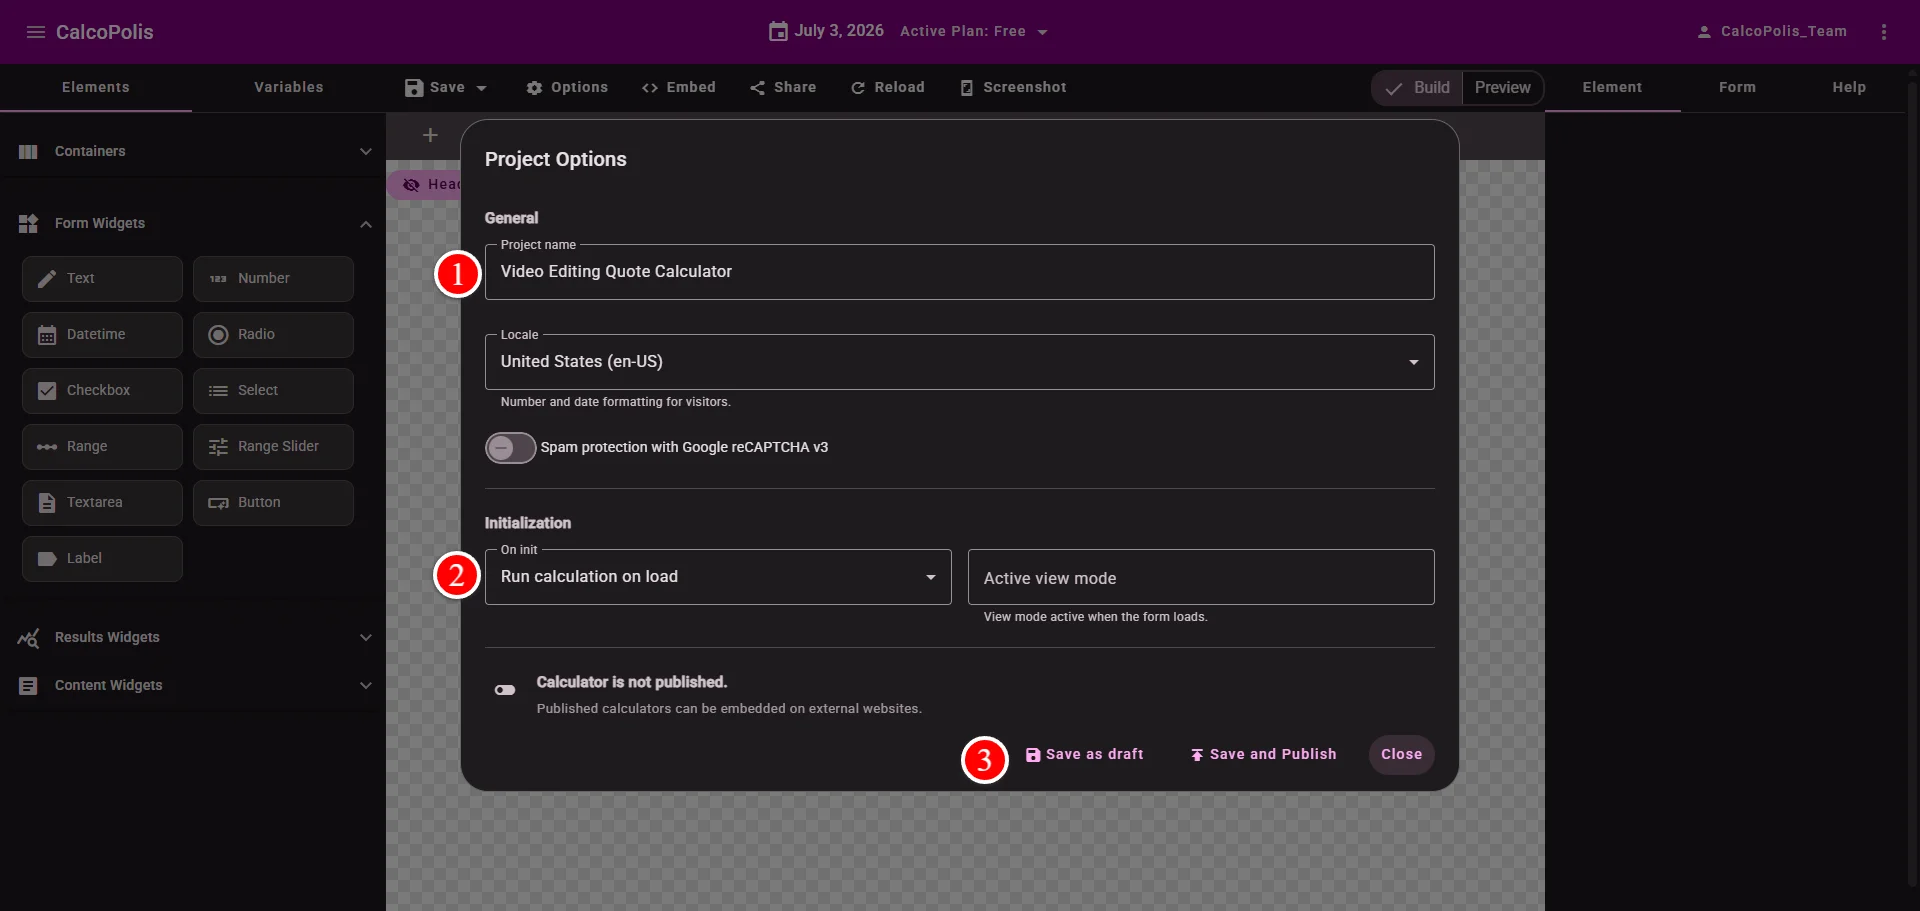 Figure 4 — Name your project and enable live calculations
Step 5 — Test the first form in Preview
- Switch to Preview mode (toolbar toggle).
- Change the length and move the slider — the Estimated quote should update automatically.
- Switch back to Build when done.
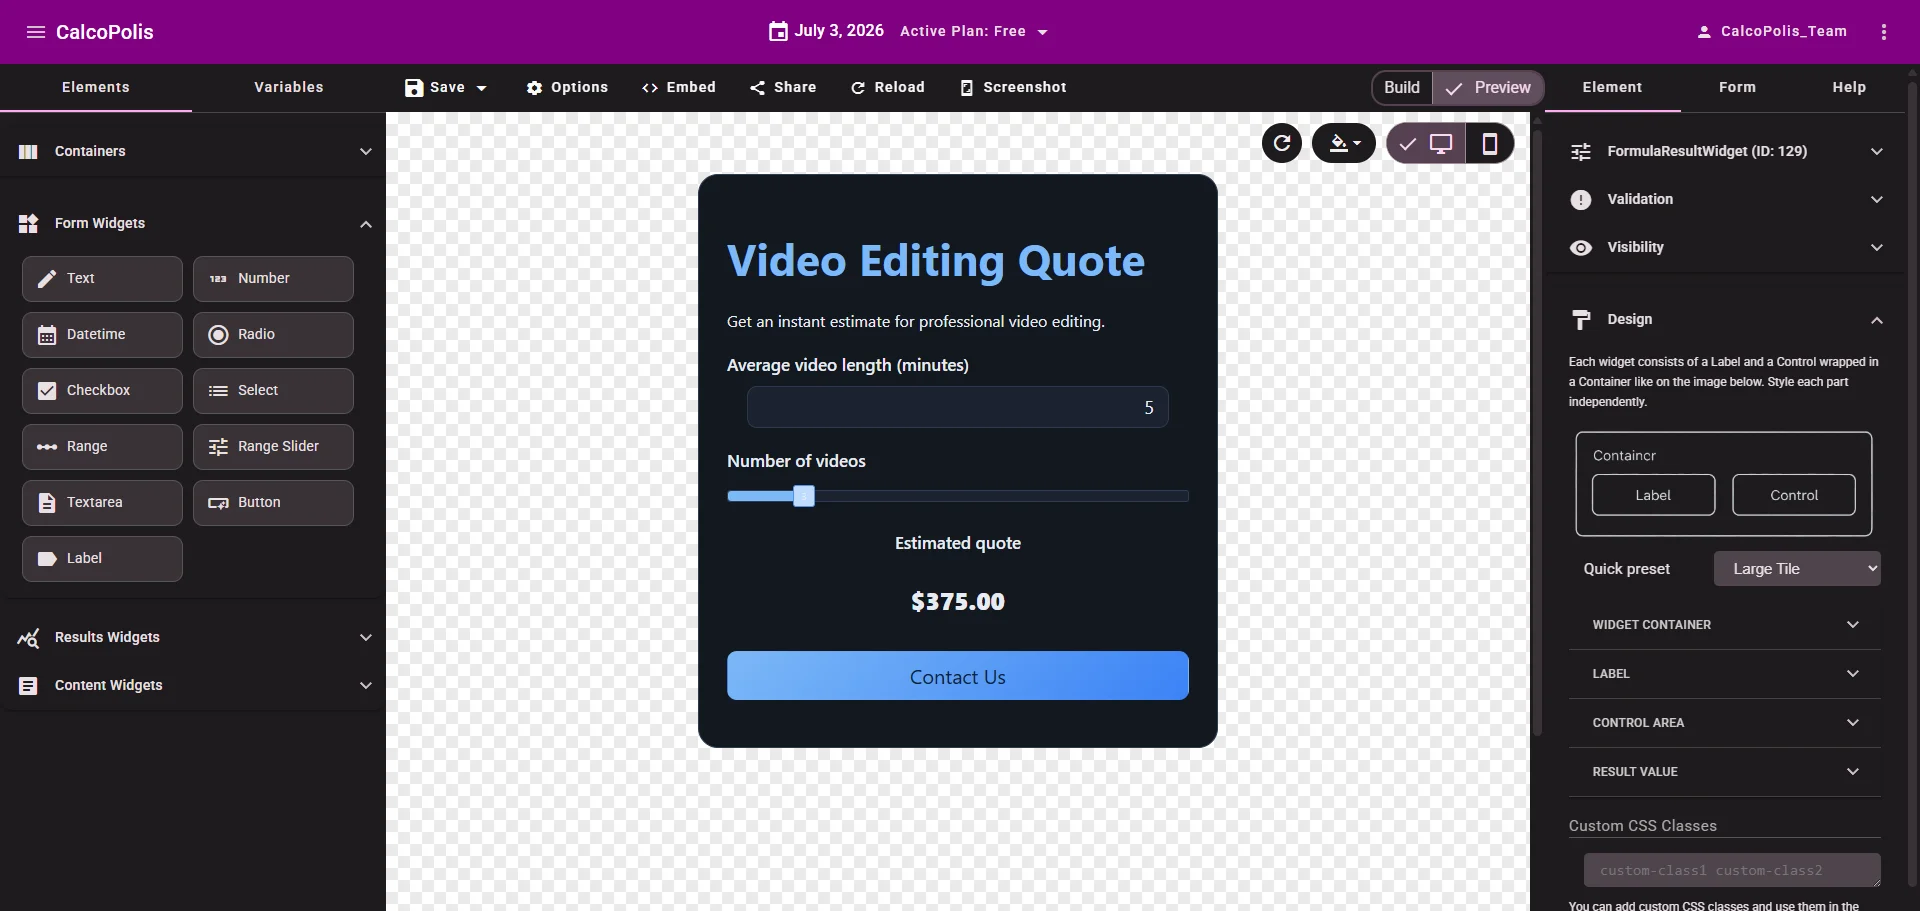 Figure 5 — Live quote in Preview mode
Step 6 — Add the second form and wire the Contact Us button
- In the subform tab bar, click + to add a new form.
- Rename the new tab to Contact Us.
- Switch back to the Get a Quote tab.
- Select the Contact Us button → under On Click, click Add action.
- Add Show Form → select the Contact Us form.
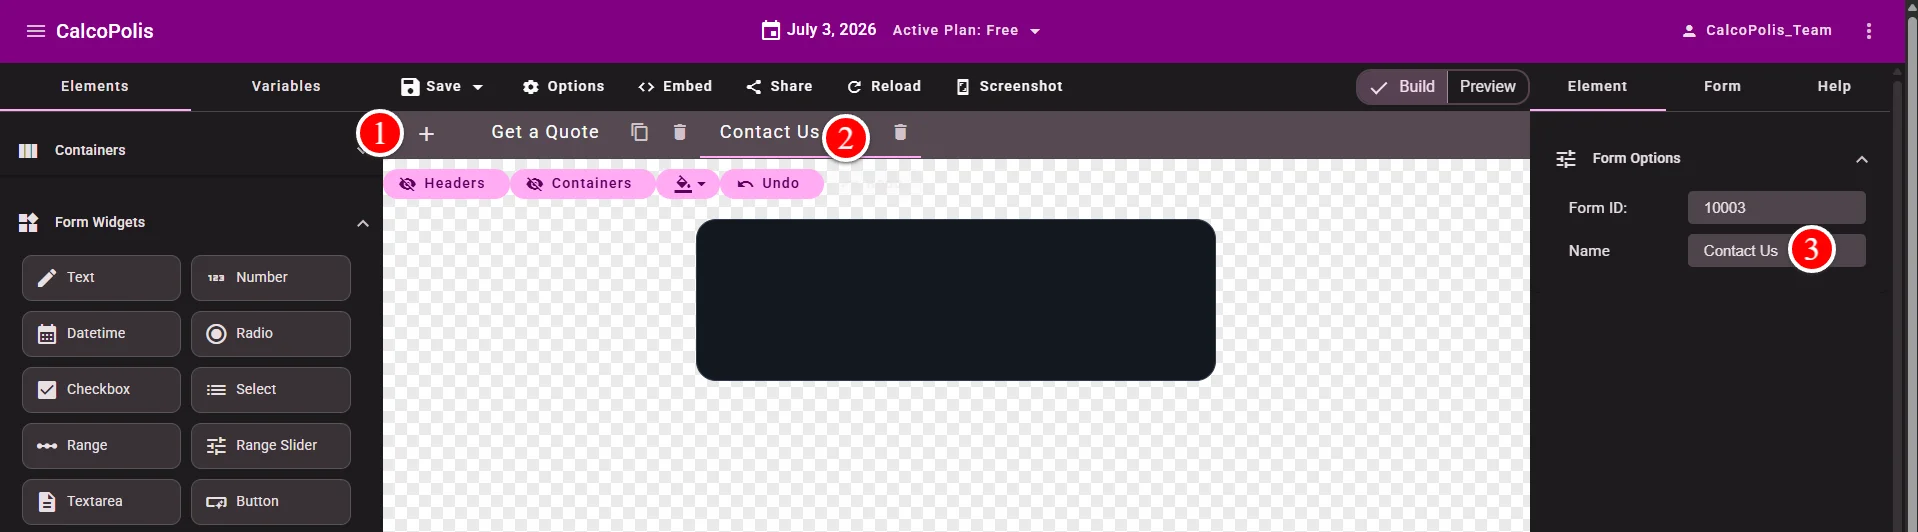
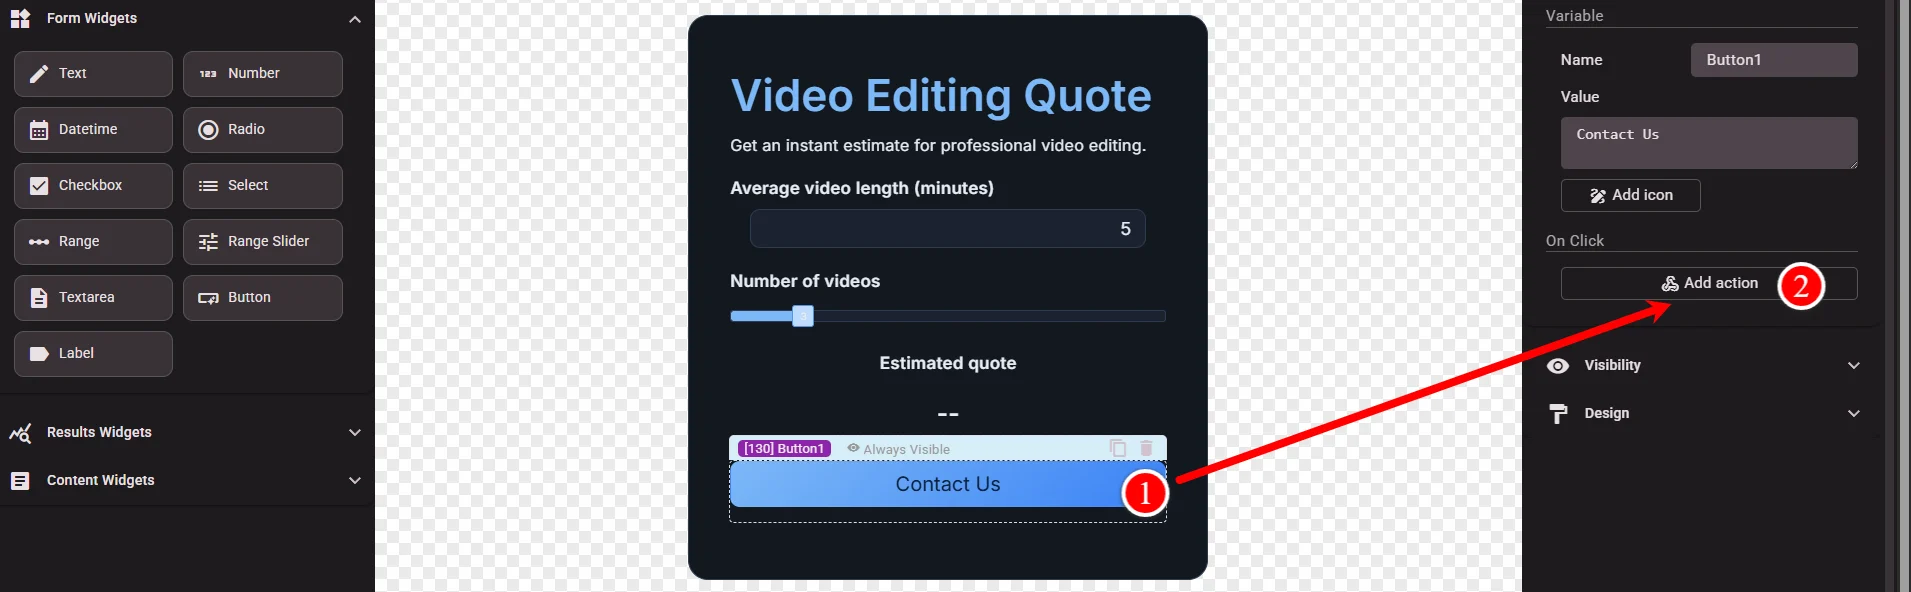
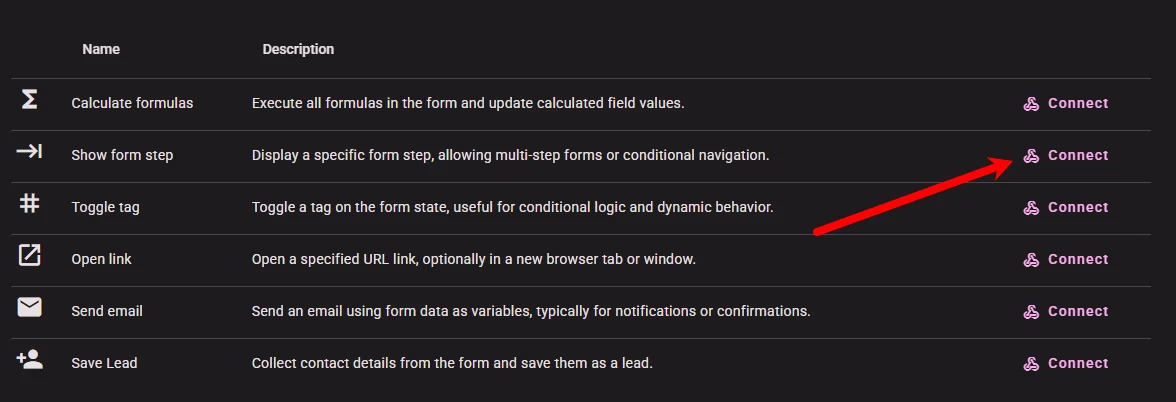 Figure 6 — Contact Us navigates to the second form
Step 7 — Add widgets to the Contact Us form
Select the Contact Us subform tab. In the Elements panel, add:
Header
- Content Widgets → Header
- Set text to
Tell us about your project
Custom Text
- Content Widgets → Custom Text
- e.g. Leave your email and a short message. We will get back to you with a detailed offer.
Text (email)
- Form Widgets → Text
- Name:
contact_email - Label:
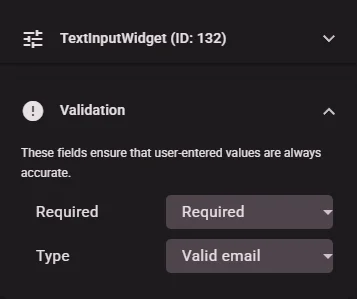
Email - Open the Element tab → expand Validation:
- Required →
Required - Type →
Valid email
Textarea
- Form Widgets → Textarea
- Name:
contact_message - Label:
Message - Element tab → Validation → Required →
Required
Button
- Form Widgets → Button
- Set label to
Send(actions come in Steps 8–9)
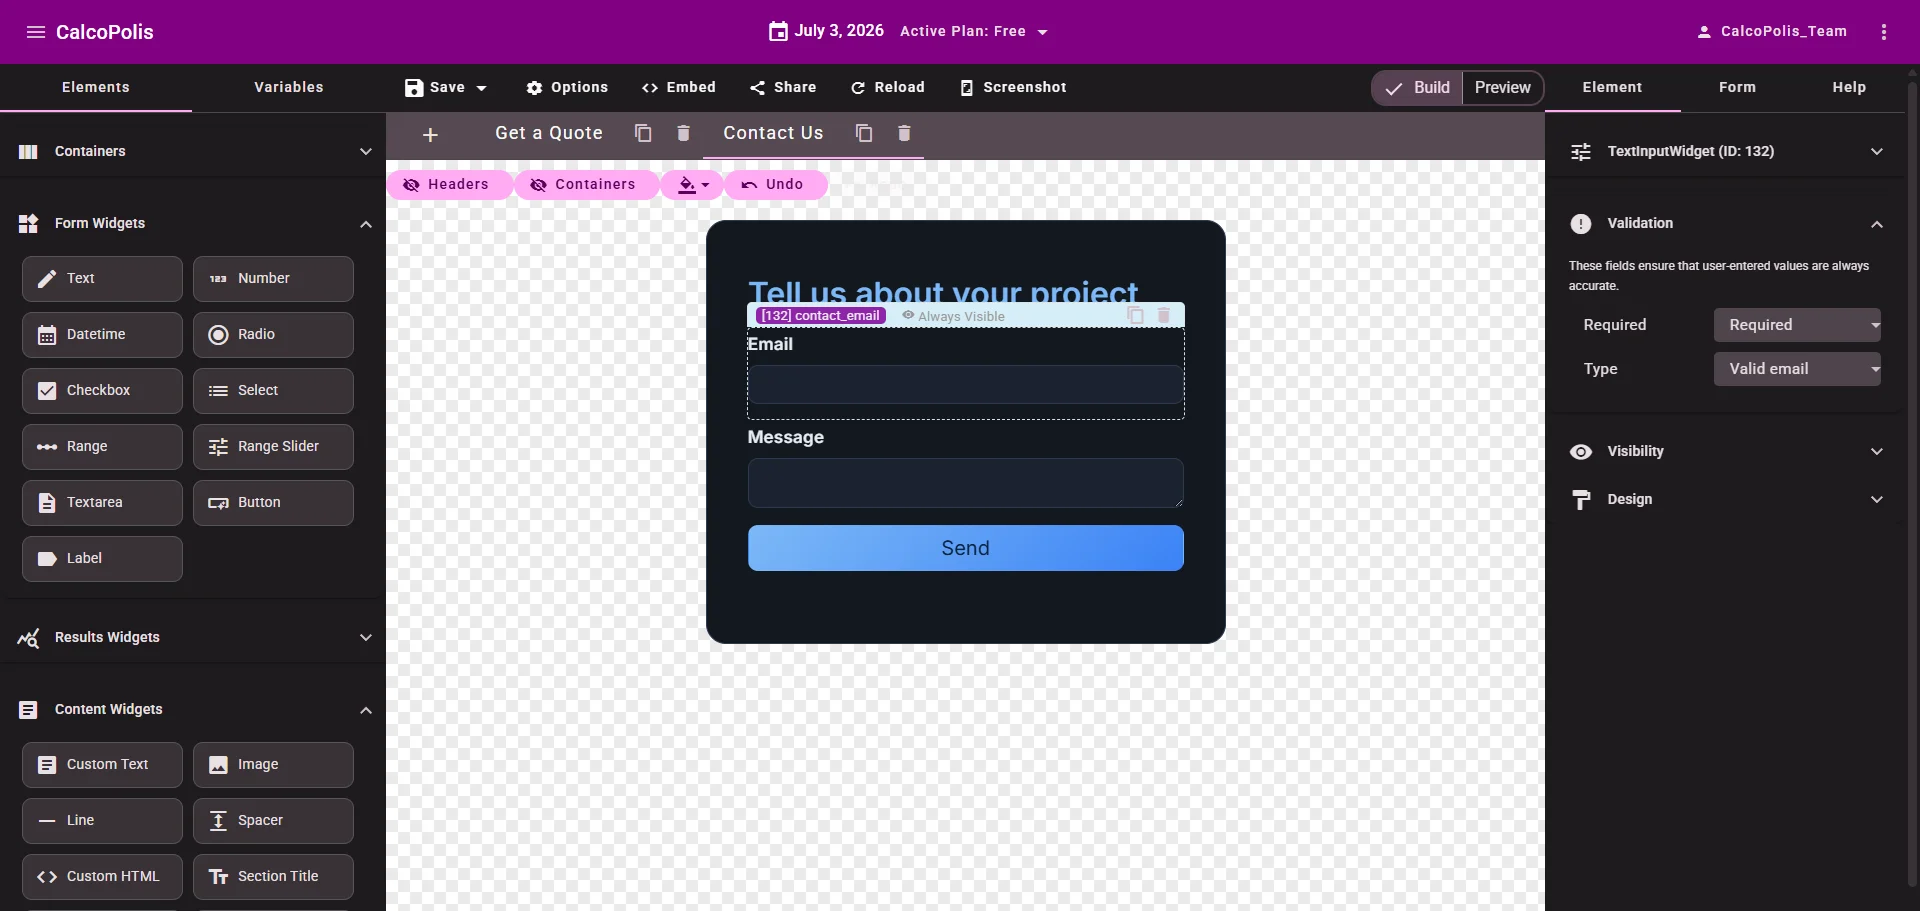 Figure 7 — Contact fields on the second form
Step 8 — Add Save Lead to the Send button
- Select the Send button on the Contact Us form.
- Under On Click, click Add action.
- Add Save Lead and map fields:
email→contact_emailmessage→contact_message- Set Order to
0. Leave Show Form for the next step.
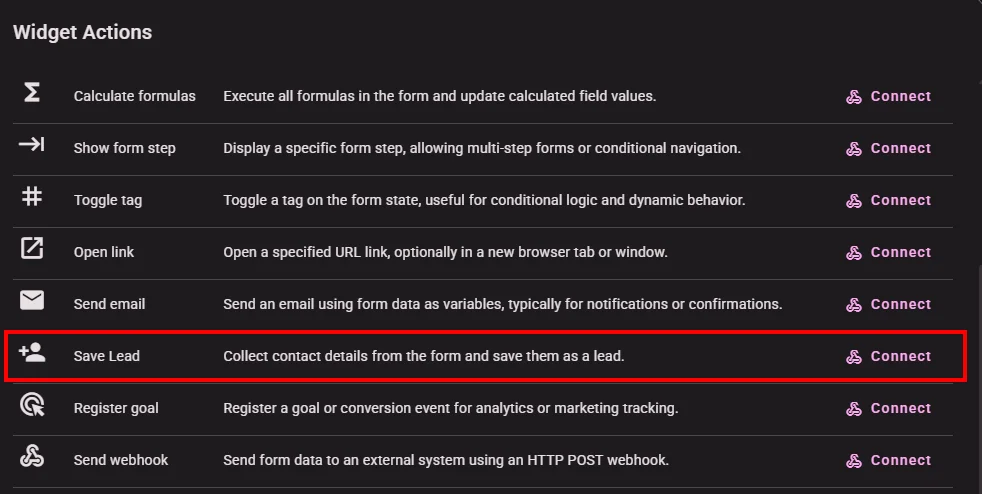 Figure 8 — Map form fields to lead properties
Step 9 — Add the Thank You form and complete the Send button
- Click + on the subform tab bar → add a third form.
- Rename it Thank You.
- Go back to the Contact Us form and select the Send button.
- Add a second action under On Click:
| Order | Action | Configuration |
|---|---|---|
| 0 | Save Lead | (already configured) |
| 1 | Show Form | Target: Thank You |
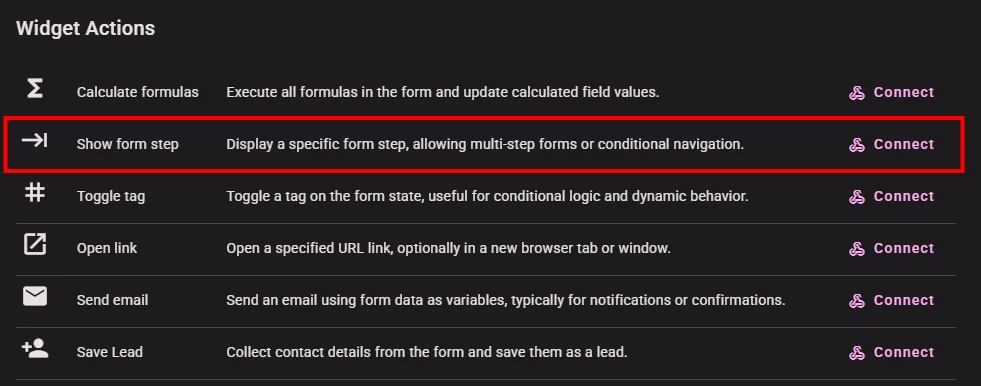
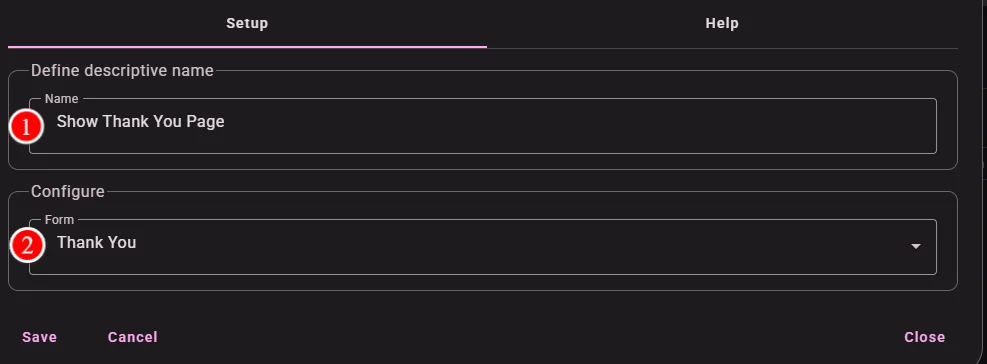
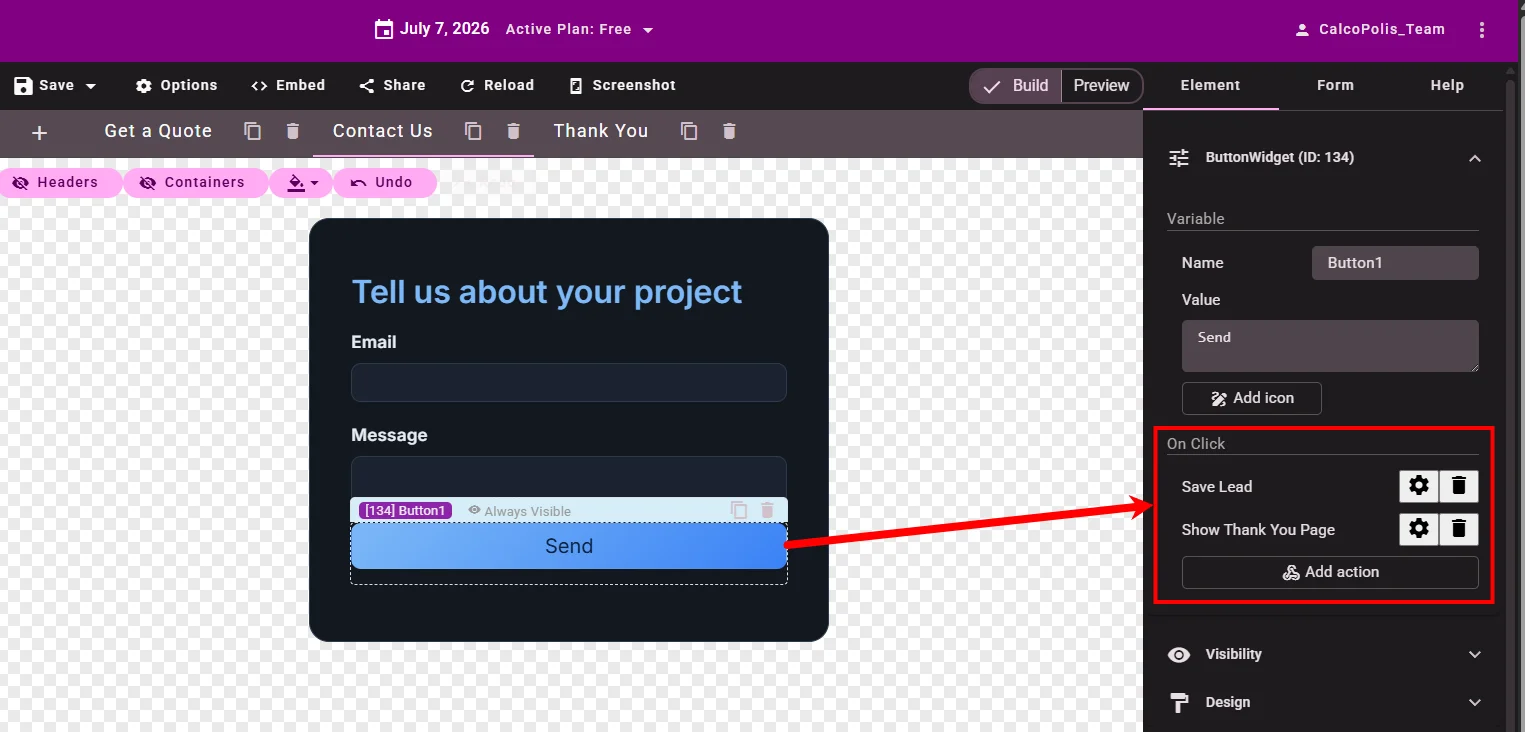 Figure 9 — Save lead, then show thank-you screen
Step 10 — Add widgets to the Thank You form
Select the Thank You tab and add:
- Header →
Thank you! - Text → We received your request and will contact you shortly.
No button actions needed — this is the final screen.
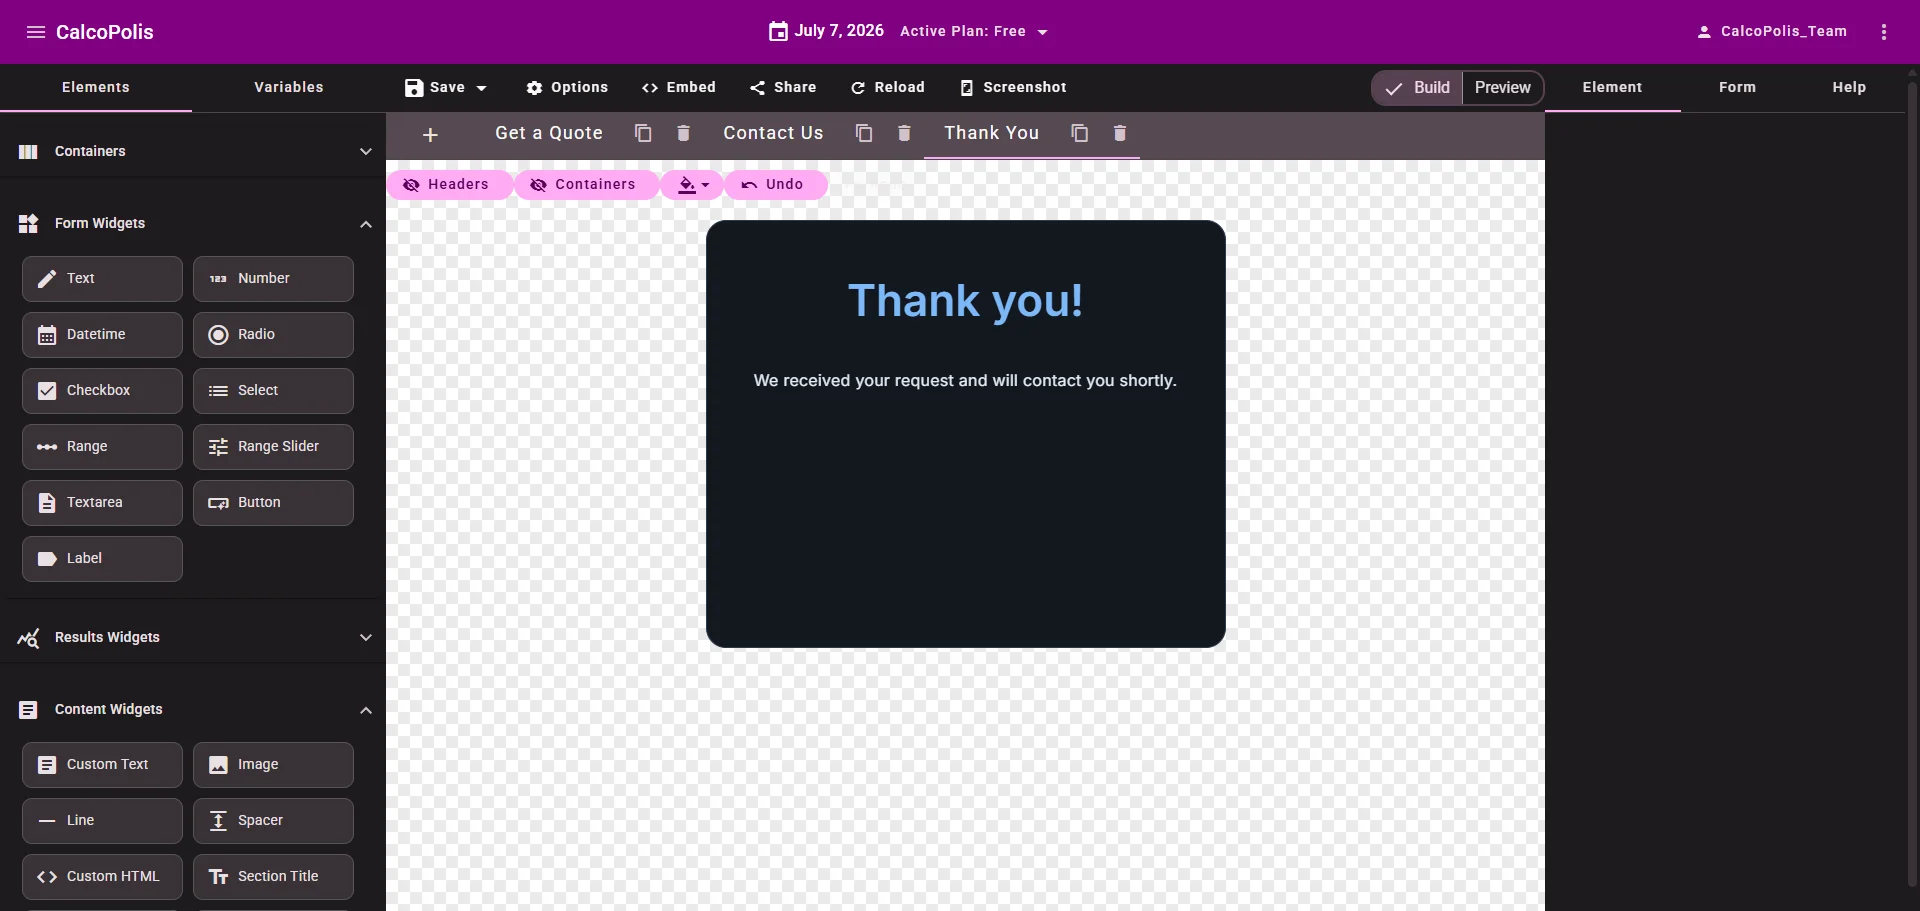 Figure 10 — Confirmation message on the last step
Step 11 — Test the full flow and verify the lead
- Switch to Preview.
- Walk through all three steps: adjust the quote → Contact Us → fill email and message → Send.
- Confirm the Thank You screen appears.
- Open Leads (
/leads) in a new tab. - Find the new lead — it should include the email, message, and captured values such as
estimated_quote.
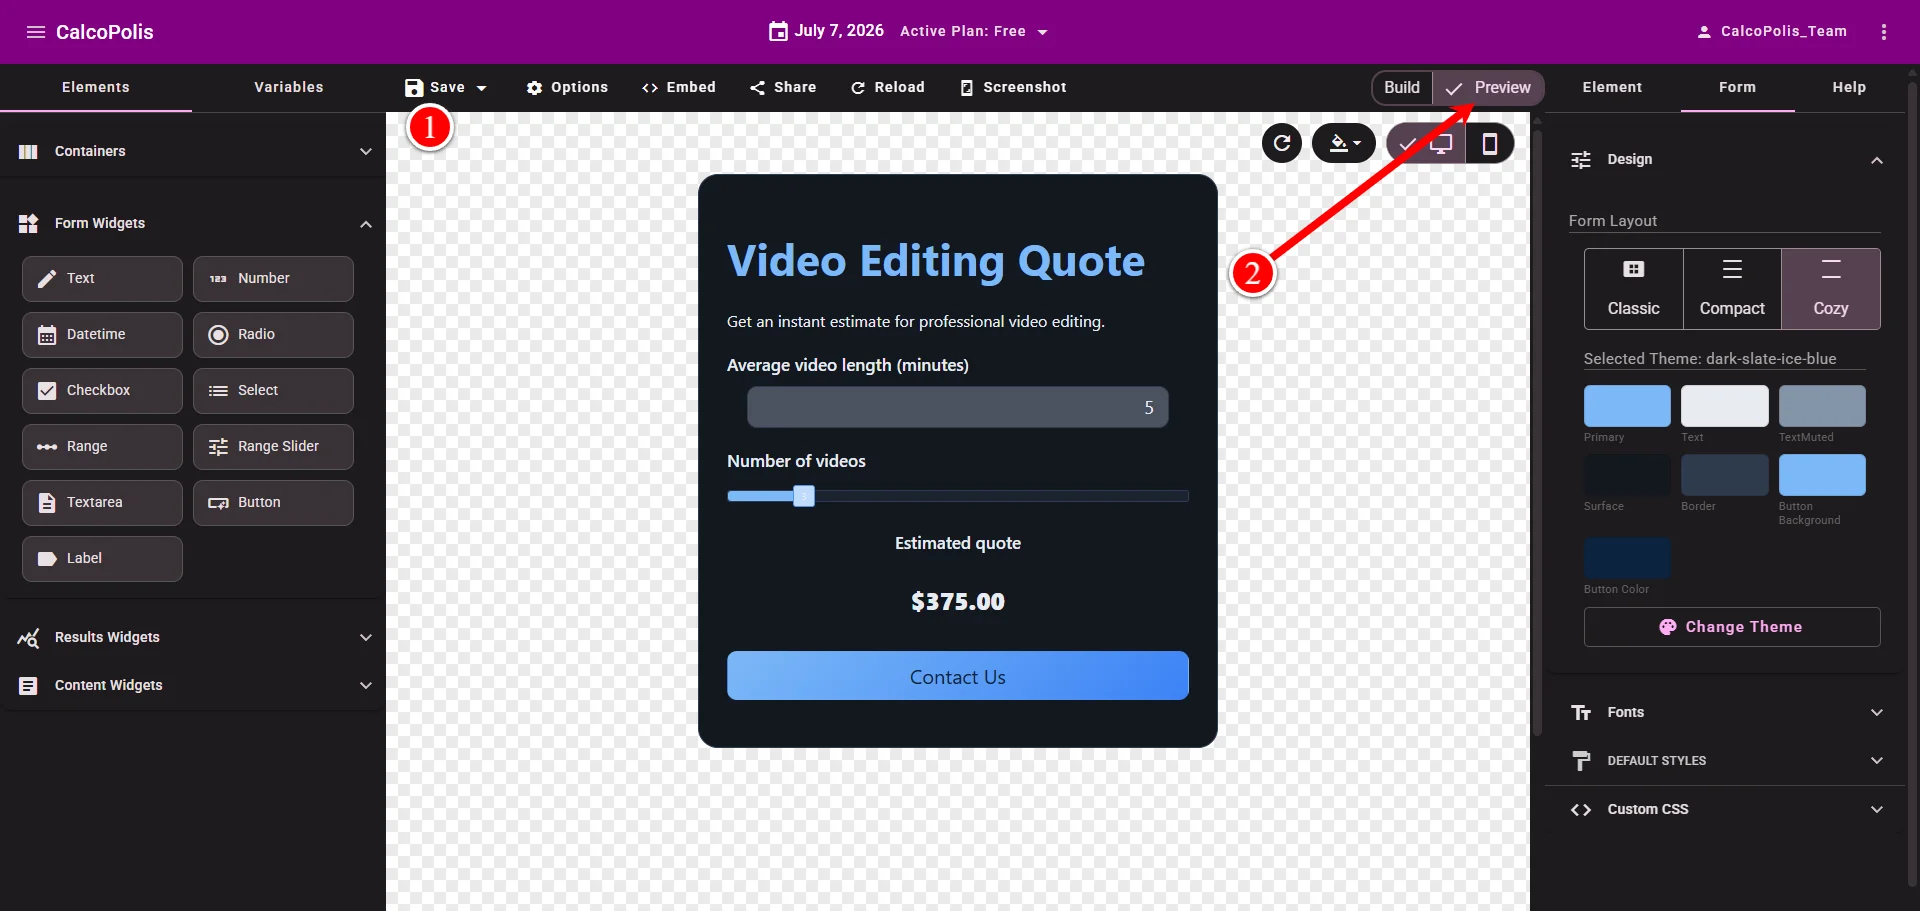
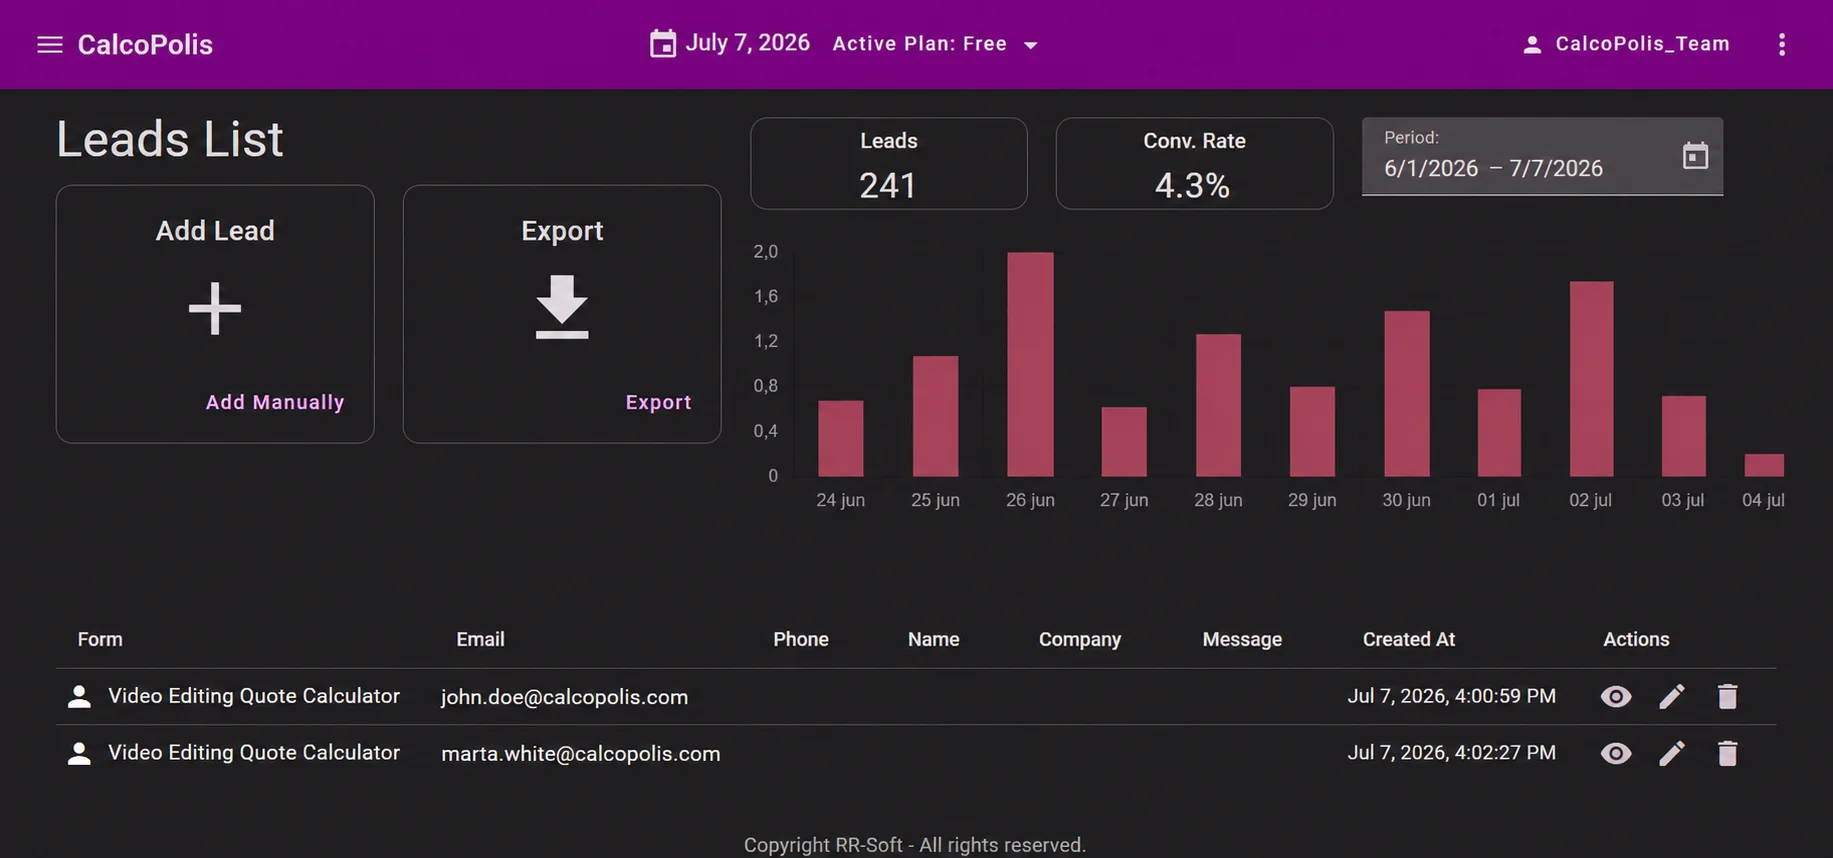 Figure 11 — Lead captured with quote and contact details
Step 12 — Save and publish
- Return to the builder and click Save → Save & Publish.
- Confirm when prompted — this publishes the calculator so it can run on external sites.
Your calculator is now live on Calcopolis servers.
Step 13 — Embed on your website
- In the builder toolbar, click Embed (code icon).
- Turn on publishing if prompted, then copy the embed code from the Custom Website tab.
- Paste the
<script>snippet into your website HTML where you want the calculator to appear.
Use Form Placement in the dialog if you need the widget before or after a specific HTML element instead of inline.
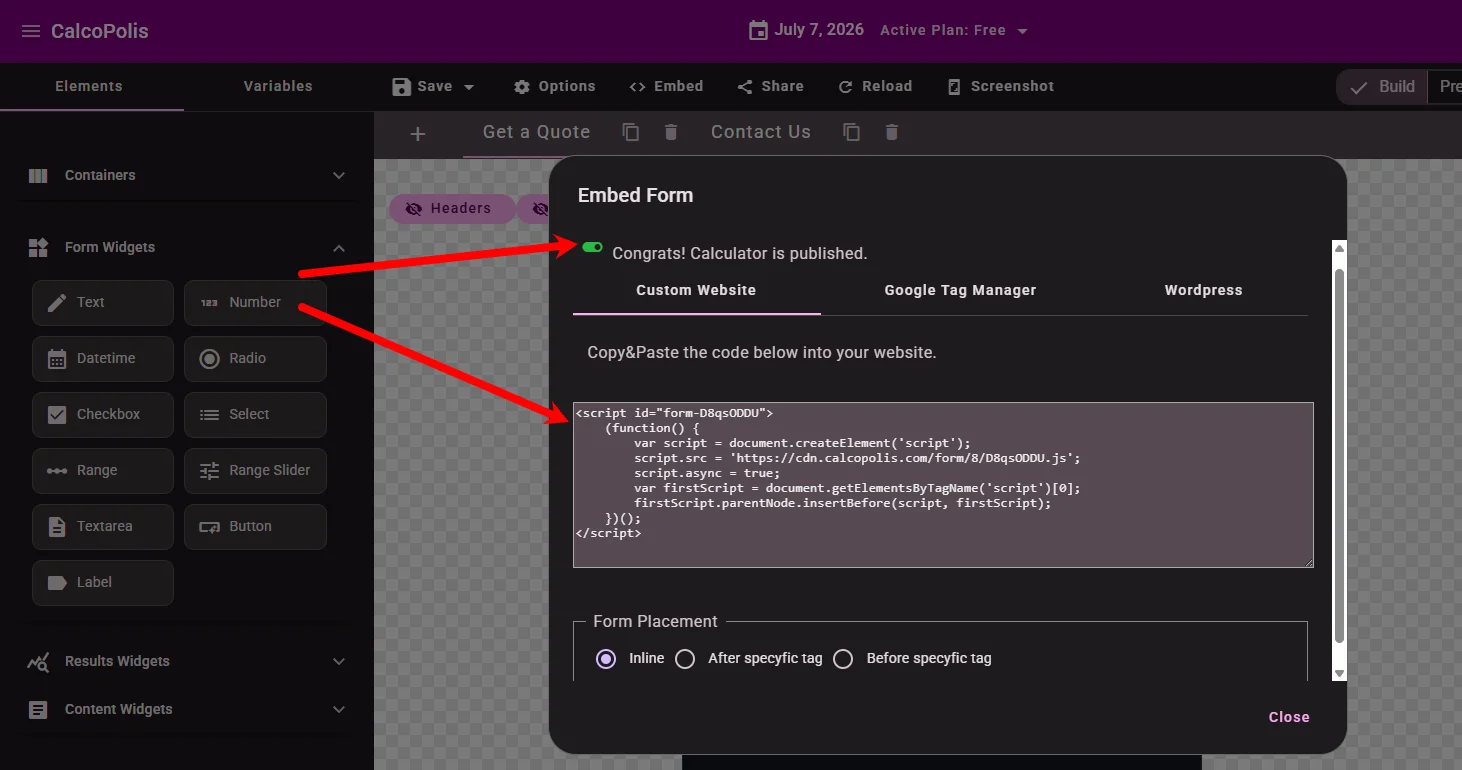 Figure 13 — Copy embed code for your site
What you learned
- Drag-and-drop widgets and formula-based pricing
- Project-wide themes without per-field styling
- Multi-step forms with Show Form
- Lead capture with Save Lead
- Preview, publish, and embed on any website
Troubleshooting
| Problem | Solution |
|---|---|
Quote shows 0 or empty |
Check Name fields match the formula (avg_length, num_videos). Enable Run calculation on load in Options. |
| Quote does not update in Preview | Save the draft after enabling calculate on load. Reload Preview. |
| Contact Us does nothing | Show Form must target the Contact Us form. Re-select it after creating Step 6. |
| Lead not saved | Map contact_email → email in Save Lead. Use a valid email in Preview. Save the project before testing. |
| Email validation fails | Select the email Text widget → Element tab → Validation: Required → Required, Type → Valid email. |
| Embed code empty | Publish first (Save & Publish or toggle in Embed dialog). |